Motorcycle batteries aren’t huge, and when they fail to start the engine, it makes for a bad day. Due to this, many are wary of running a lot of electronics while the engine is off. In this project we solve that problem on my BMW 1200GS by installing a small auxiliary battery. At the same time, we installed front and rear safety lighting.
This battery runs only the safety lights and electronics; it charges from the bike’s electrical system when the ignition is on. When the bike is turned off, the auxiliary battery and electronics are disconnected from the main battery. This allows the lights and electronics to run without draining the main battery. While I use this primarily for additional lighting, this project might be of interest to anyone that wants to carry a bit of extra power without taking up precious space in their bags.
Some details of the installation follow. As usual, I’m a bit longwinded. If you are simply looking for a parts list, skip down to the resources section, there are also a few pictures in the photo gallery.
Background
I volunteer as motorcycle safety on events from time to time and I’ve always wanted some additional blinky beyond my hazard lights. While LED lights don’t draw much current, I was concerned that they may run down the battery after a day’s worth of service with only intermittent charging from the engine.
Installation
 First off, credit really goes to Paul on this one. To say he helped out would be an understatement. He did most of the work while I watched. He did let me use the heat gun a couple times though.
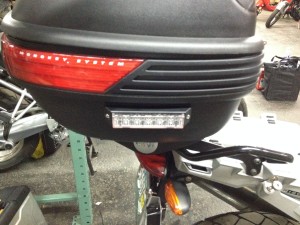
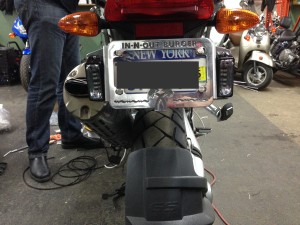
The biggest decisions on this project where about mounting–for both the lights and the battery. The 1200GS isn’t really designed with additional safety lighting or batteries in mind. After a fair amount of discussion, we decided to try two lights under the hand guards, two on a license plate frame and two on the trunk.
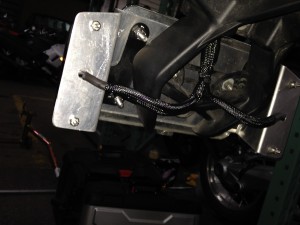
All of the lights were wired up with 4-conductor speaker wire. The wiring for the front lights follows the break/clutch cables down and back to the seat area between the decorative plastic and the tank. The rear wiring snakes under the pillion to the battery area.
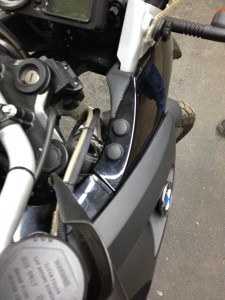 There are two switches that control the front and rear lights. They are mounted on the right side. As the bike’s owner, it’s a bit painful to drill into those panels (it’s good to have a trusted friend do the drilling). These switches look quite good though–almost as if they were factory installed. And, a future owner could easily repurpose these for some other accessories.
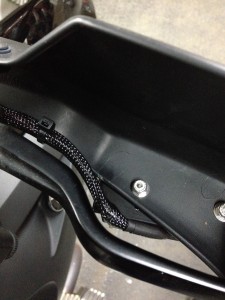
For the wiring, I couldn’t find black speaker cable anywhere, so we covered the white wire with braided cable sleeve. The cable sleeve is held in place with shrink tubing. While this is more work than just using black cable, the finish looks quite good. We also used waterproof butt connectors to make all the connections to the lights, so they should work well for years, even in wet conditions.
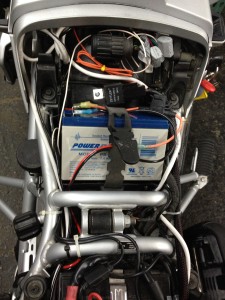
For the battery, Paul brought a small 7 amp-hour battery that we hoped to mount in the tool kit tray under the seat. We managed to fit it in without much modification. By removing the tool tray and moving the relay that sits below it, the battery just fits under the seat. The rubber tool roll holder is now an auxiliary battery holder.
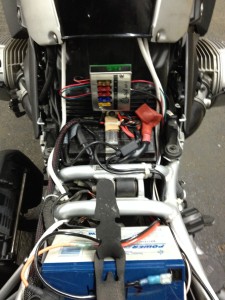 All of this is tied together with a Centech fuse panel and wiring harness. The panel is just the right size to be screwed directly onto the air box over the main battery. Once again, putting holes in the stock plastics is tough, but these are out of the way, and it makes for a solid mounting point for the electrical. I think this is a pretty common place to mount a Centech 1200GS because of it’s accessibility. The only possible problem I see there it that it might be difficult to replace the battery without removing the fuse panel.
The auxiliary fuse panel is wired to the main electrical system through a relay. When the ignition is on, the relay closes and ties the two electrical systems together so the auxiliary battery will be charged as long as the engine is running. When the ignition is turned off, the relay opens and disconnects the two systems, so the auxiliary lights aren’t draining the main batter when the engine is off.
Conclusion
The end result is a really clean installation, it even looks relatively good under the seat. The video below shows the new lighting in action–even NYC cab drivers pay attention to it. So, I’m happy with it and can’t wait to try it out on the next event. As I said before, adding this sort of lighting to a 1200GS appeals to a very limited audience. But, having an auxiliary battery is something many people could appreciate, especially those that use their bikes for camping. Having some additional 12 volt power in a remote area isn’t a bad thing.
A couple things would be nice to add to this installation. One is a quick disconnect for the trunk so it can be removed without cutting the cable. Also, an SAE cable connected to the fuse panel would allow for charging of the auxiliary battery with a battery tender. That could also serve as a temporary connection point for other accessories.
Photo Gallery
Resources
Power
- Centech AP-1 Auxiliary Power Fuse Panel with AP-170R Relay Wiring Kit
- Powersonic PS-1270 F2 Sealed Lead Acid Battery
Lighting
- Strobes N More E6 Super MINI LED (2)
- Whelen LINZ6 Super LED (4)
- Whelen RBKT4 Swivel Mount Bracket (2)
- Replacement Black Flange (RFLANGEB) for Whelen TIR3 (4)
- Lay-Back Bracket
Wiring & Misc.
- 18 AWG, 4-conductor Speaker Wire (black if possible)
- SPST Weatherproof Round Rocker Switch
- Heat Shrink Tubing
- 1/4 inch Braided Cable Sleeve, Black (and some 1/2 inch as well)
- Snap-action 5-Wire Block Connector (12-28 AWG)
- Snap-action 3-Wire Block Connector (12-28 AWG)
- 22-18 AWG 3/16in Female Push On Connector
- Assorted heat-shrink butt and terminal connectors
- Assorted stainless steel nuts, bolts & washers
- Inline Fuse Holder
- Not used, but would have been nice: Cold Splice Wire Tap
[…] The project writeup is here: BMW 1200GS Auxiliary Battery and Lighting. […]