Over the years, vintage audio components can begin to fail due to the age of their electronics. In this project, a non-functional Bose 901 Equalizer is repaired by replacing the old resistors and capacitors with modern parts.
Background
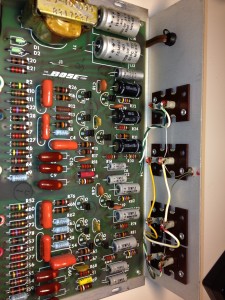
A friend got sort of a two-for-one deal on some vintage Bose 901 speakers. These speakers were designed to be used with an active equalizer; without it, the sound quality is quite poor. One of his EQs worked well, but the other, not so much. He found this post on KF7LZE’s Blog about replacing the old resistors and capacitors to bring the old equalizer back to life and suggested that I give it a go. I’m happy to report that the repair was a success and, while I haven’t heard for myself yet, I’ve been told that it sounds “awesome” it sounds pretty awesome. The before and after pictures appear below and there is a parts list in the resources section at the end.
The Process
 Research: This part was done for me. Based on KF7LZE’s blog post, I was confident that, if executed properly, this repair would work. I was slightly concerned about by ability to execute, but I was reminded that the EQ didn’t work anyway–no matter what I did, it wasn’t going be any worse.
- Ordering Parts: Using the schematic (PDF) and the actual board as a cross reference, I made a list (CSV) of all the components I would need to order. Note that I didn’t replace everything on the board. Only the resistors and most of the capacitors. There are a few ceramic capacitors, transistors and other parts that I didn’t bother to replace. Per the KF7LZE post, I went with higher wattage resistors and in many cases, lower tolerances. I took a similar tack with the capacitors in that I replaced with higher voltage ratings and lower tolerances in some cases. There were a couple minor discrepancies between the schematic and the board. In those cases, I went with what was soldered to the board. I was able to source most of the parts from Digikey, but used Mouser for the parts that were out of stock.
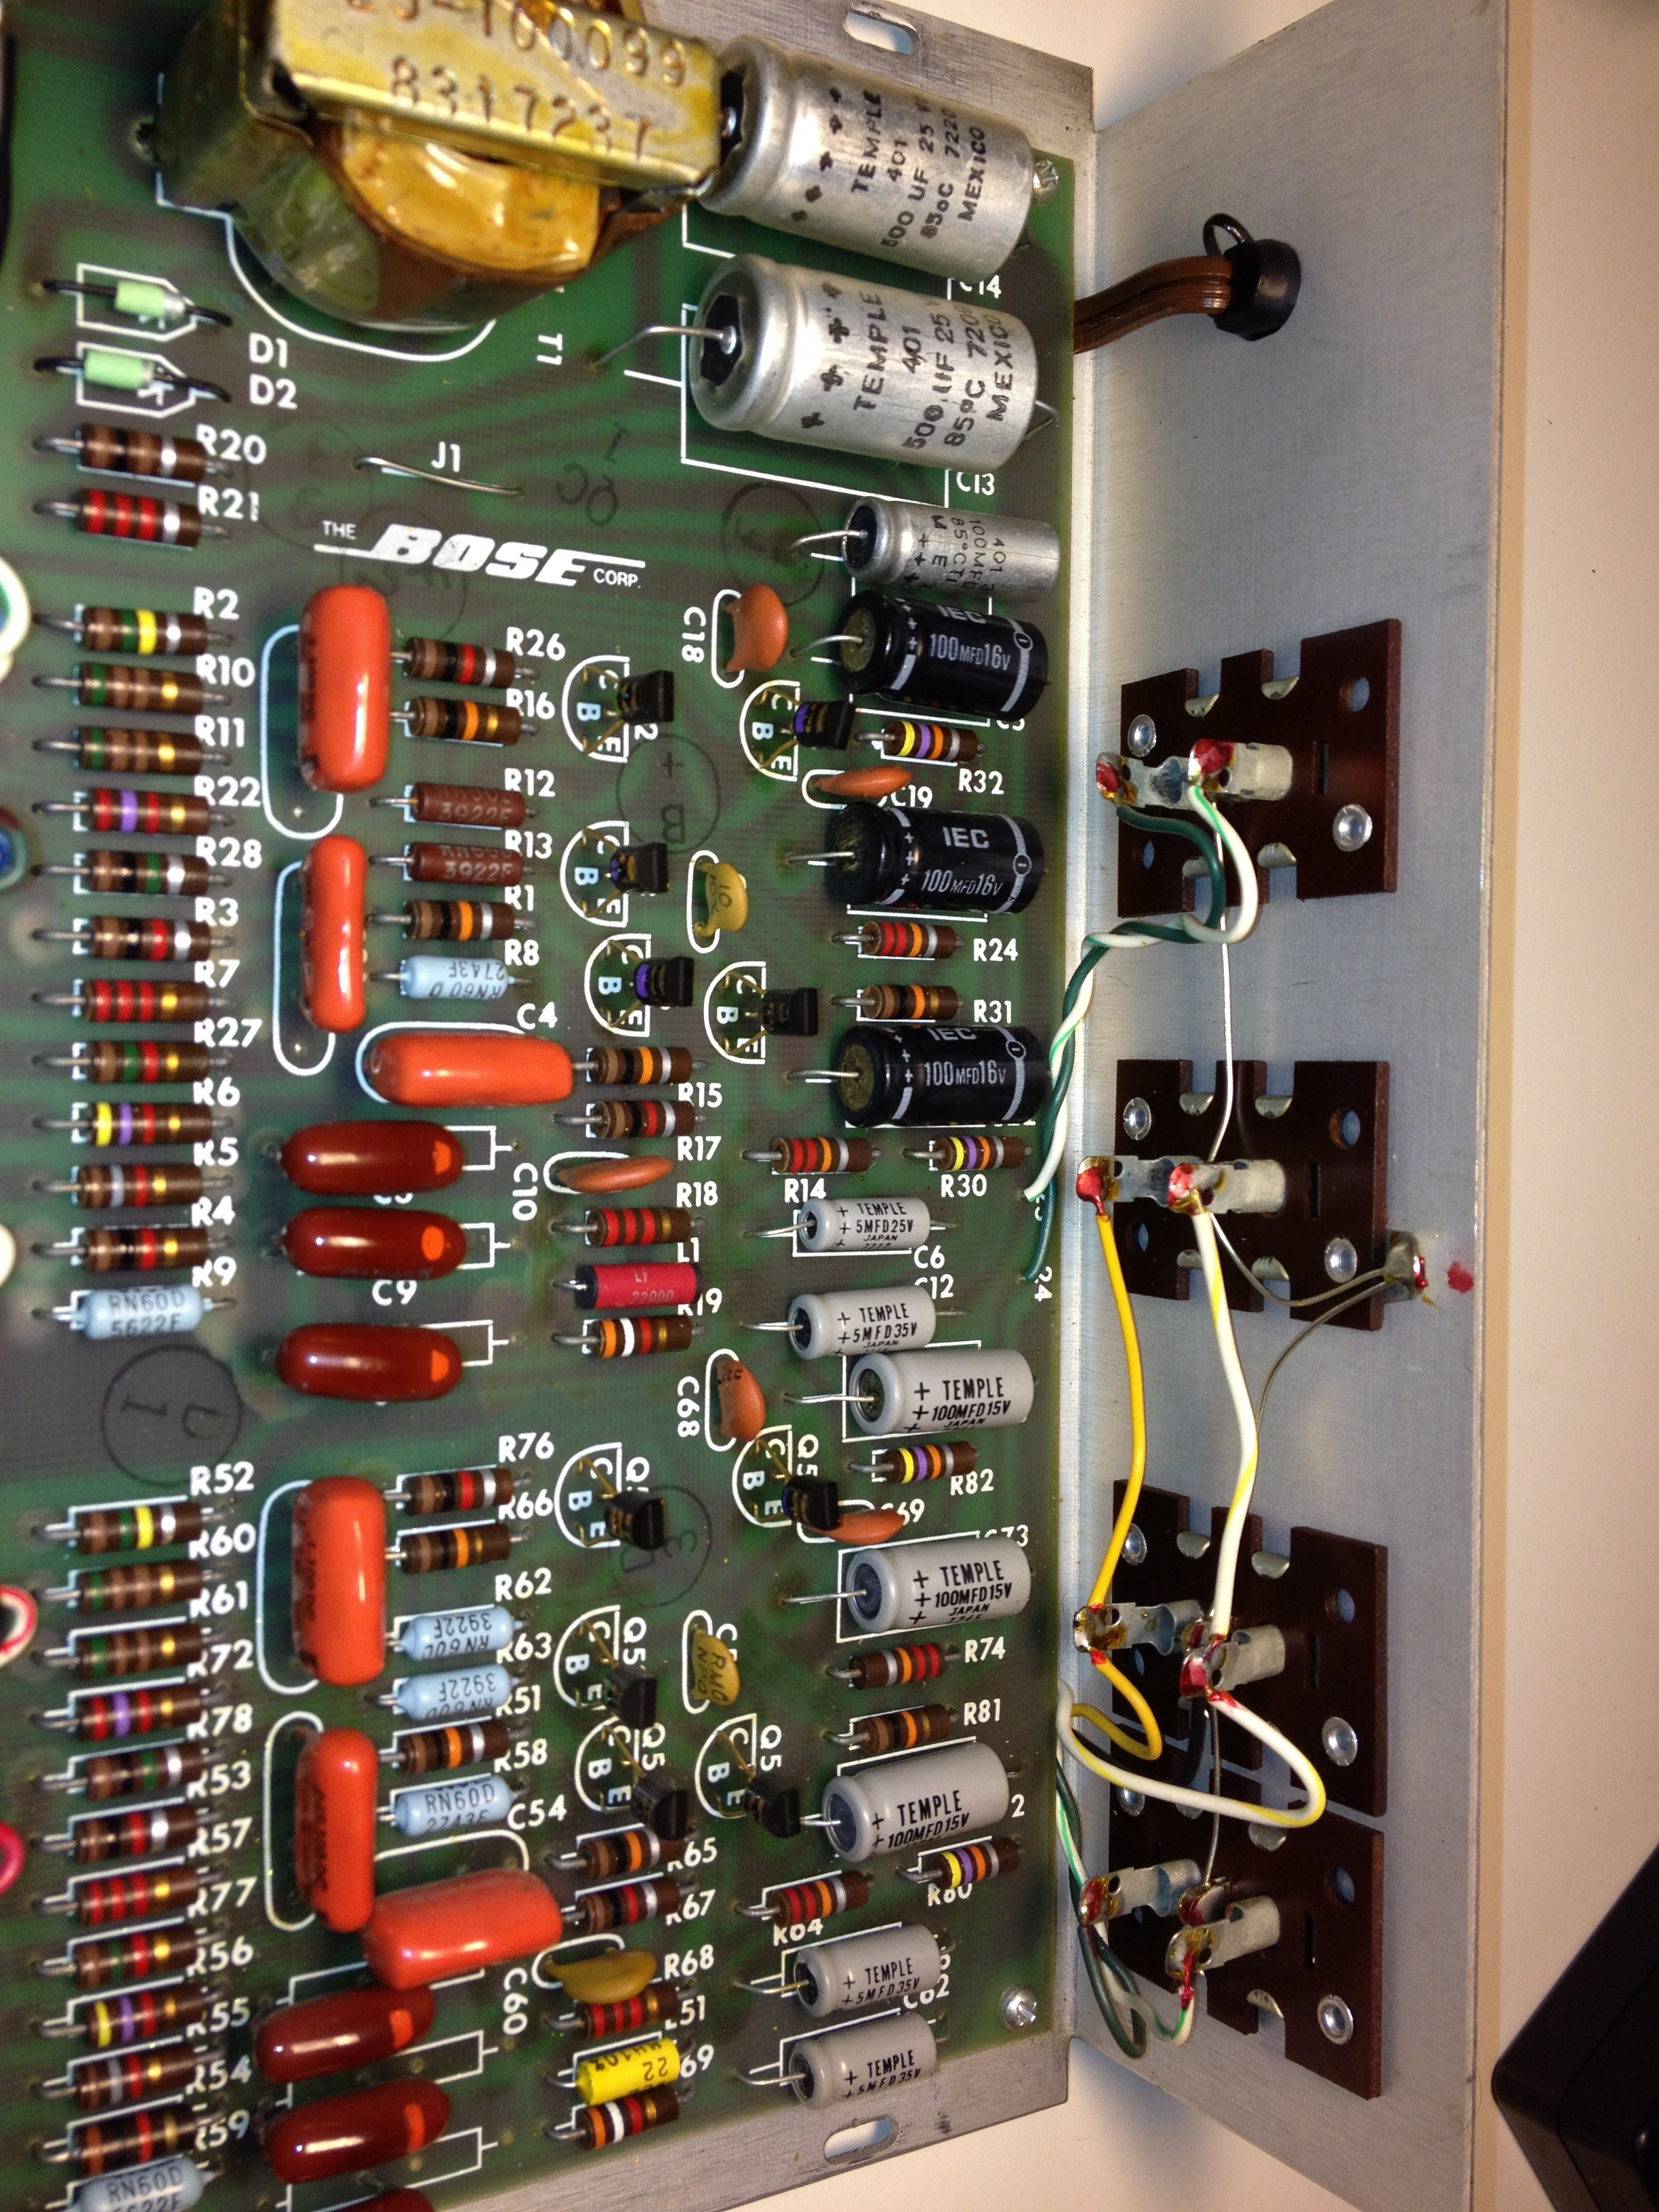
- The Repair: Before getting started, I double checked the parts I had received against the parts list. Then I got to work. The board needed to be removed from the enclosure. Before doing so, I took several pictures. I also labeled each of the wires attached to the board before removing them. Desoldering was the biggest job here. When I first popped the cover off this EQ, I was a little concerned about the number of components I would need to desolder. But, once I got the hang of it, things moved along quite quickly. Having a rework station would have made things much, much easier, but I wasn’t going to invest in one just for this project. I used a solder sucker as it seemed to be faster than a wick. Although, I used a wick for clean up in a couple places. For the first couple components, I was trying to desolder and remove the whole component. Then, I realized it would go much faster if I clipped the component off the board first, then melted the solder while pulling out what was left of the lead. Finally, I’d clean up with the solder sucker. This process made things move quickly. I didn’t remove all of the components from the board at the same time. Rather, I alternated between removal and adding. I did this to ensure that I was replacing parts with the right thing.
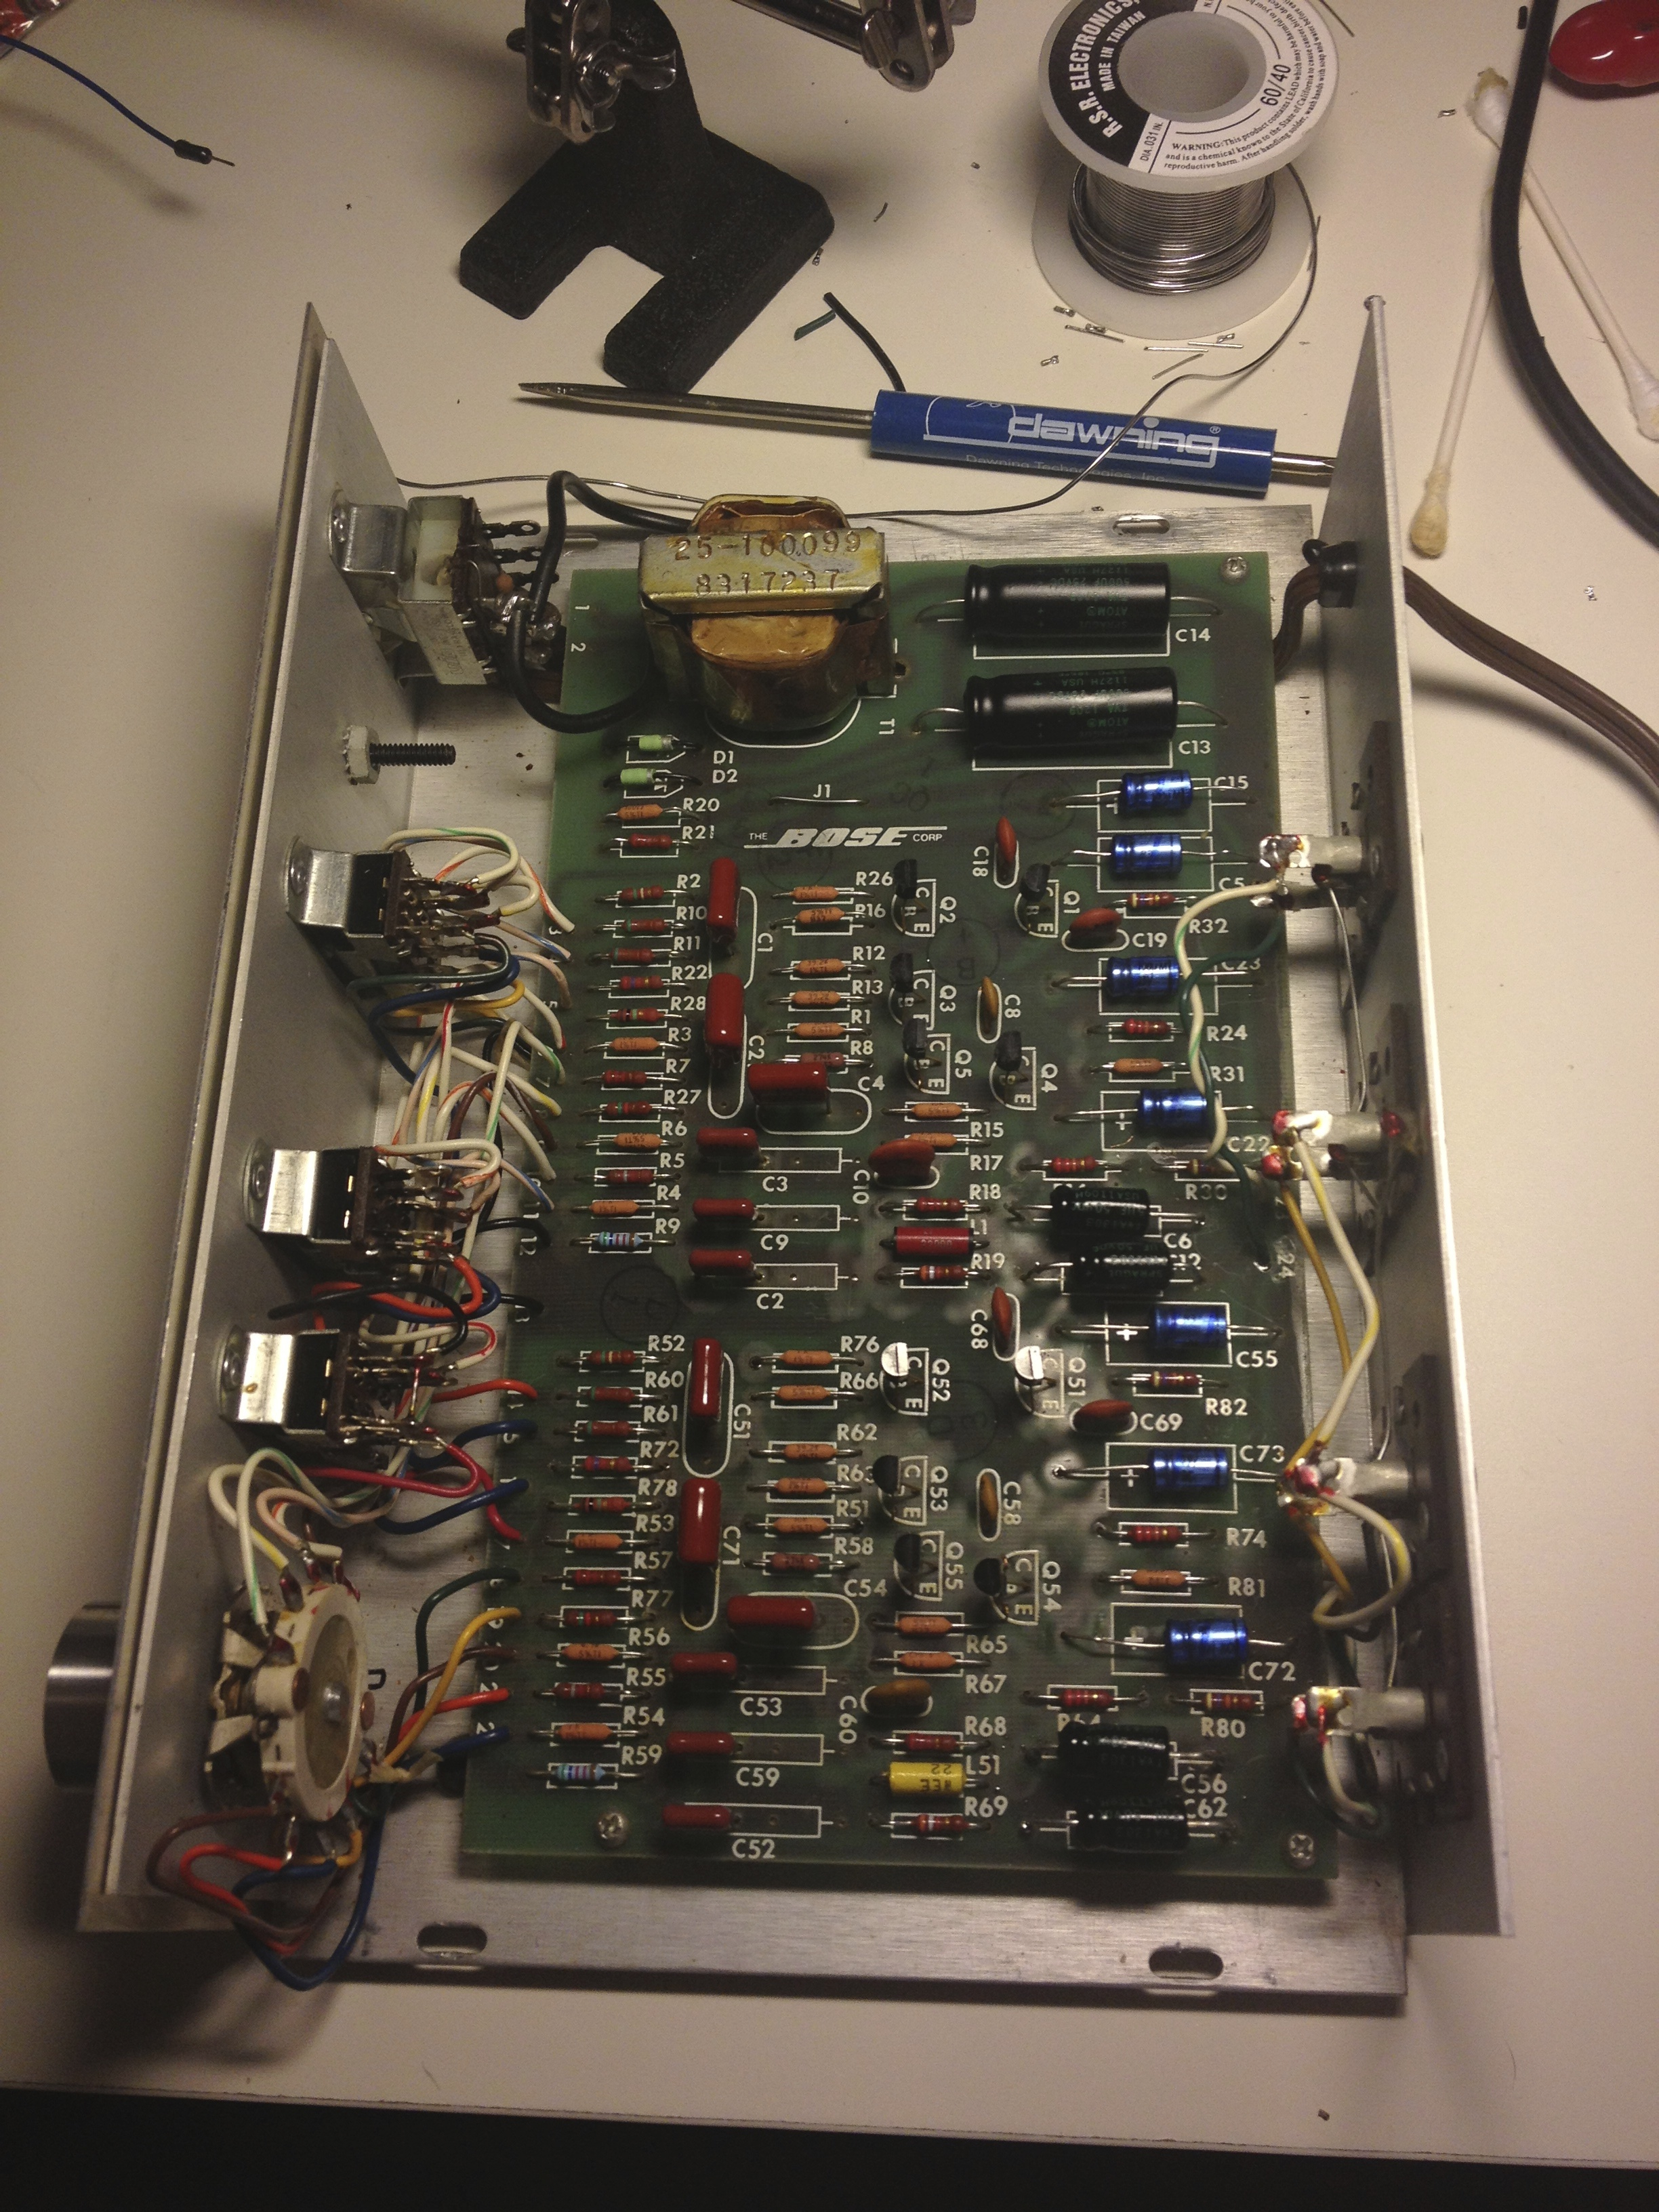
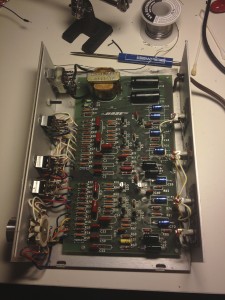 After much desoldering (so much that my original solder sucker broke) and soldering, I had replaced everything that needed to be replaced. I then put the board back in the enclosure and reconnected all the wires.
 - Smoke Test: Since I didn’t have the speakers, and I lacked good test equipment, all I could really do was plug it in to make sure it didn’t blow up. With a fire extinguisher at the ready, I plugged it in. No smoke, no fire, test passed!
- Sound Test: I wasn’t around for the original sound test, but the report was positive. Since then, I’ve been able to check out the installation. The Bose 901s produce great sound, especially with live recordings. I was concerned that there might be some hum or other noise produced by the EQ, but the sound was quite clean.
Conclusion
An inoperable EQ is now working again and the sound system makes a nice addition to a friend’s art studio. I also got much better at both desoldering and soldering–two important skills. And, I got quite good at reading resistor values without needing to cross reference a color chart. So, I’ll call this project a success.
All in, these components were about $60. Unless you are in it for the learning experience, you might be better served paying a few more dollars and having someone else do the work. For me, it was worth it just for the experience.
Resources
- The inspiration for this came from KF7LZE’s post
- Bose 901 Series 1 Equalizer Replacement Parts List (CSV)
- Bose 901 Series 1 and 2 service manual (PDF) (includes schematics)
[…] just finished repairing an old Bose 901 Equalizer for a friend. The repaired board is pictured here. There’s a full write up in the projects […]