tl;dr: If you’re thinking about buying a Twine, do yourself a favor and look for something else.
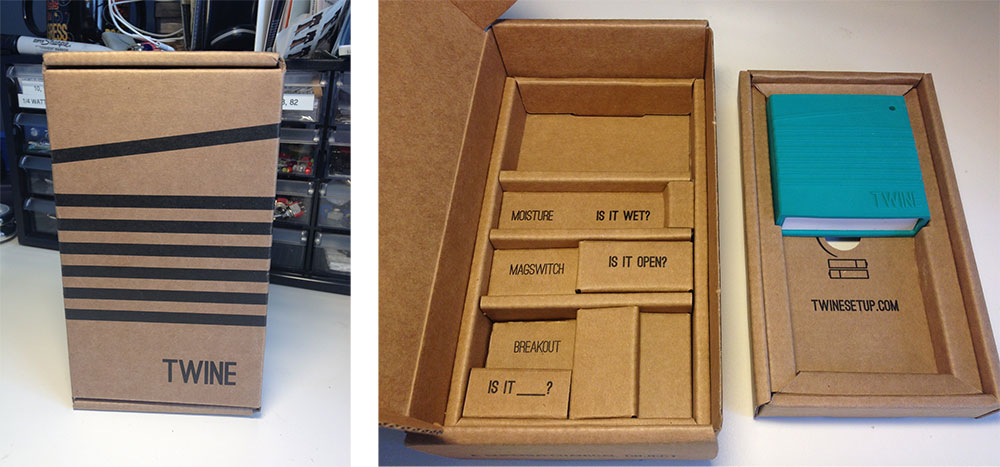
I was doing a bit of cleaning and ran across my old Twine. It reminded me of how excited I was initially, and how disappointed I was when it didn’t meet expectations. Supermechanical did a great job in the beginning, the design was good, the packaging was delightful and their user interface was easy to use.
Twine wasn’t perfect though, the backend system lacked some key features, wasn’t reliable and the device was a black box that wasn’t hackable at all. For the most part, the users were understanding in the early days, most of the original backers from Kickstarter knew they weren’t buying a mass market product and expected some bumps in the road. Supermechanical was responsive initially, but after a few months, their responsiveness and software updates tapered off.
While user questions went unanswered on the Twine Community forums, Supermechanical started talking about a new product on their blog. The new product turned out to be Range, an iOS thermometer. As one of those users, I felt dumped. The product I had purchased was being ignored for something shiny, new, and ready-made for the sous-vide craze.
Unfortunately, things never got better. While it looks like one can still buy a Twine, it seems totally unsupported, at least based on the recent comments in the community forums and on the kickstarter page. Too bad since it had so much potential.
Update 2014-11-16: You should read my Twine Update if you are considering the purchase of a Twine.
Twine was one of those Kickstarter projects that really blew up. Supermechanical asked for $35K and ended up raising more than $550K. The project was funded at the beginning of 2012, so the funders have been waiting a while for their Twine. Mine arrived this week.
The project has been sending updates on their progress over the past few months. Anyone contemplating a hardware project would be wise to take a look at Supermechanical’s blog to get a taste of what such a project may be like. They’ve posted on all sorts of topics from PCB fabrication to injection molding to shipping boxes. Speaking of boxes, they did a bang-up job on the packaging (see photo). I wasn’t expecting much from the packaging since the project had many, more pressing issues to deal with, but they put some effort into the packaging, which goes a long way towards making a good first impression.
Since this is an internet connected device, one of the things I was really interested in was how they handled the initial setup. The Twine doesn’t have a display for output nor does it have a keyboard or a mouse for input–not even a reset button. So, how does one select which wifi network to join and enter the password? They’ve made it easy, the instructions are simple. Install the included batteries, go to the Twine setup web site and follow the instructions. The setup process basically puts the Twine in adhoc network mode so one can connect to it with another wifi enabled device with a browser. This allows one to select the proper wifi network and enter a password if needed. Supermechanical did a great job on this interface, and the setup process. It gets the Twine set up quickly and with little effort.
Once the Twine is set up, one can see its current state (temperature and orientation, currently) on the Twine website. The same web site is used to create rules for the Twine. Currently, the rules can be triggered on an orientation change or when the temperature passes a certain set point. When triggered, the action can be lighting the onboard LED, sending an email, SMS or HTTP request. To make the Twine a bit more extensible, some additional work needs to be done on the available conditions, and it appears that this is will probably happen in the near future.
Overall, I’m really impressed with the Twine, and I’m eager to see what they do with it in the coming months. The beginnings of a good community are forming in the Twine forums and the people from Supermechanical are very engaged, so I think the future is bright for this device.
Update 2014-11-16: You should read my Twine Update if you are considering the purchase of a Twine.
Recently, my Twine came in the mail. After getting it set up, I went to work on my first project. This is a goofy little demonstration project, but it shows some of the powerful capabilities of internet connected devices–the internet of things (IoT), if you will.
The basic idea here is to make something happen when the orientation of the Twine is changed. I decided to raise and lower a flag. When the Twine is set up on end, the flag goes up, when it is placed flat, the flag goes down. This video shows the Twine and flag controller in action. Please excuse the poor overall quality of the video, and the build for that matter. Also, the very important message on the flag is just a bit out of date.
If you are still reading, I’ll assume that you want to know a little bit about how this all works. I’ll try to be as succinct as possible.
The main components are:
Twine
Web Service
Arduino Uno
Roving Networks RN-134 (RN-131) Wifi module
Micro Servo
The Twine is set up with two simple rules, one for each orientation that should affect some change (back and top). Both of the rules fire an HTTP Request to a little web service I created in PHP. The LED also lights up, just to get some local feedback. The calls to the web service look something like this:
http://jpreardon.com/twine/data.php?key=keyValue&orientation=[orientation]The web service is really, really basic. It just stores the last value of the “orientation” parameter, so long as the keyValue matches the stored key. If one hits the web service’s URL without any parameters, it will send back the stored value. It doesn’t do this in a nice format such as JSON or XML, just plain old text.
The Arduino is set up with a WiFly transceiver and polls this web service on a regular basis. When it sees a change in the orientation of the Twine, it will move the servo with the flag attached to it accordingly.
If you look closely in the video, you’ll notice that the breadboard containing the circuit to drive the WiFly and the servo is more complicated than it needs to be. This is because the circuit and much of the code used to talk to the WiFly was recycled from a back-burnered project. This could be a very simple circuit, even simpler if an ethernet or wifi shield is used.
To wrap it up, Twine is awesome, they did a great job with this device. Of course, there’s always room for improvement. In that vein, here are some observations/requests of this early release of Twine:
The web service call happens impressively fast, much faster than it appears in the video above. The slowness there is due mostly to wait times in my polling code. The orientation data hits the web service almost immediately.
It would be really nice to be able to replace the homegrown “web service” with something like Cosm or Open Sen.se. However, both of these IoT platforms require the input to be POSTed in a format like JSON, XML or CSV. Right now, Twine only does GET requests. It would be nice if one could have a bit more control over Twine’s HTTP request
The rule set for Twine is a bit anemic right now. It would be great to be able to have access to more conditions. For instance, a “change” condition would be great for web service calls like this. This sort of condition would allow for data logging and all sorts of other things
I think integration with sites like IFTTT is in the offing. That would really open up the possibilities for how Twine can interact with the world without being limited to sending email, SMS or writing your own web service.
Updated 2012-11-29: Added a link to the “web service” code.
Update 2014-11-16: You should read my Twine Update if you are considering the purchase of a Twine.
Twine is great. Out of the box, it’s easy to send email and SMS messages, but to really unleash this device’s potential, one needs to explore the HTTP Request action. This makes the Twine a node on the Internet of Things (IoT) and offers a lot of flexibility as to what can happen based on physical input. I’ve written about this before in my First Twine Project, in which I had a Twine and an Arduino talking through a quick and dirty “web service”. This was a fun proof of concept, but calling the PHP I wrote in 10 minutes a web service is a stretch. So, I’ve been looking for a more substantial web service that can be used by the Twine. Twine won’t work with many web services such as cosm (f.k.a. Pachube) or Open Sense, but it does work with at least one: ThingSpeak.
ThingSpeak is quick to set up and offers a fair amount of flexibility. One can read & write data and integrate with other services such as a Twitter or Twilio. ThingSpeak also has the added bonus of being open source, so you can set it up on your own server, if you wish. In my case, I just wanted to do some temperature logging. If you’re interested in how I did it, keep reading, the instructions are after the break.
You’ll need a Twine and a ThingSpeak account. Assuming you have both of those things, the first thing to do is set up the ThingSpeak side of things. You’ll need to create a new channel on ThingSpeak, this is where your Twine will write the data. Once your channel is created, click on the API Keys tab of your newly created channel. Copy the Write API key, this is the longish (~15 characters) string. Twine will need to use this key to write data to the channel.
Now it’s time to set up some rules on the Twine, which will feed data to the ThingSpeak channel. In this case, I want temperature logging, so I want to send the current temperature to the ThingSpeak channel whenever it changes*. Unfortunately, Twine’s temperature events only trigger when the temperature rises above or falls below the value you specify. However, since more than one rule can be set up, one can cover a range of temperatures by defining two rules for each degree in the temperature range being monitored. Yes, this is a kludge, but it’s what we have to work with right now. To set up the rule, you’ll need the URL for your ThingSpeak channel, it should look something like this:
http://api.thingspeak.com/update?key=**Write API Key**&field1=[temperature]Make sure you replace
**Write API Key**with the Write API key for your channel (created above). As for the optional parameters (trigger and reset after), I left those at 0.1 and 60 seconds.Once you upload these rules to your Twine, go check your ThingSpeak channel. You should see at least one entry in your the log. A screenshot of my log from overnight appears above. So far, I’ve found that the Twine can be a bit flaky about sending out updates, even as compared to the current temperature shown on the Twine site. For my purposes, this is fine. So long as I get a reading every couple hours, I’m happy. For more precise measurements, this might not be the device for you. I do hope that the accuracy of Twine increases as they release later versions of the software.
* It would be nice if Twine supported an “on change” event, but it doesn’t–not at this time anyway. Creating a bunch of rules to track the temperature isn’t that big of deal when logging temperatures within a fairly narrow range. Doing the same for a wider temperature range of 20 or 50 degrees would just be ridiculous; I wouldn’t recommend it. Let’s hope that the Supermechanical team adds an on change event or something similar in the near future.