I tried another variation of the Low Effort Sourdough Whole Wheat Sandwich Bread today. The result was so great, I neglected to take a picture of it before it was (mostly) eaten. The ratio of whole wheat to bread flour was changed to:
80% whole wheat flour
10% bread flour
10% oats, pulsed in blender to resemble flour
The dough was noticeably drier and easier to work than the original recipe, or even the 75% whole wheat flour version. After baking, it is just a touch more dense, but still soft and sandwich-ready. The crust also seemed more tender than usual.
Special thanks to @dbazuin for giving me these flour ratios. See, sometimes you should listen to people on the internet.
Sailing season is right around the corner–in this part of the world anyway. Uno went into the water this week, unexpectedly early thanks to some of the guys at the club. That’s one less thing on my pre-season todo list. The next step is cleaning and rigging. I hope to get a shakeout sail in over the next couple weeks.
Post Office Tower and Tower Tavern I always assumed the Post Office Tower (I thought it was the “BT Tower”) was mainly for communication purposes. A London Inheritance offers a detailed history of the tower and adjacent pub.
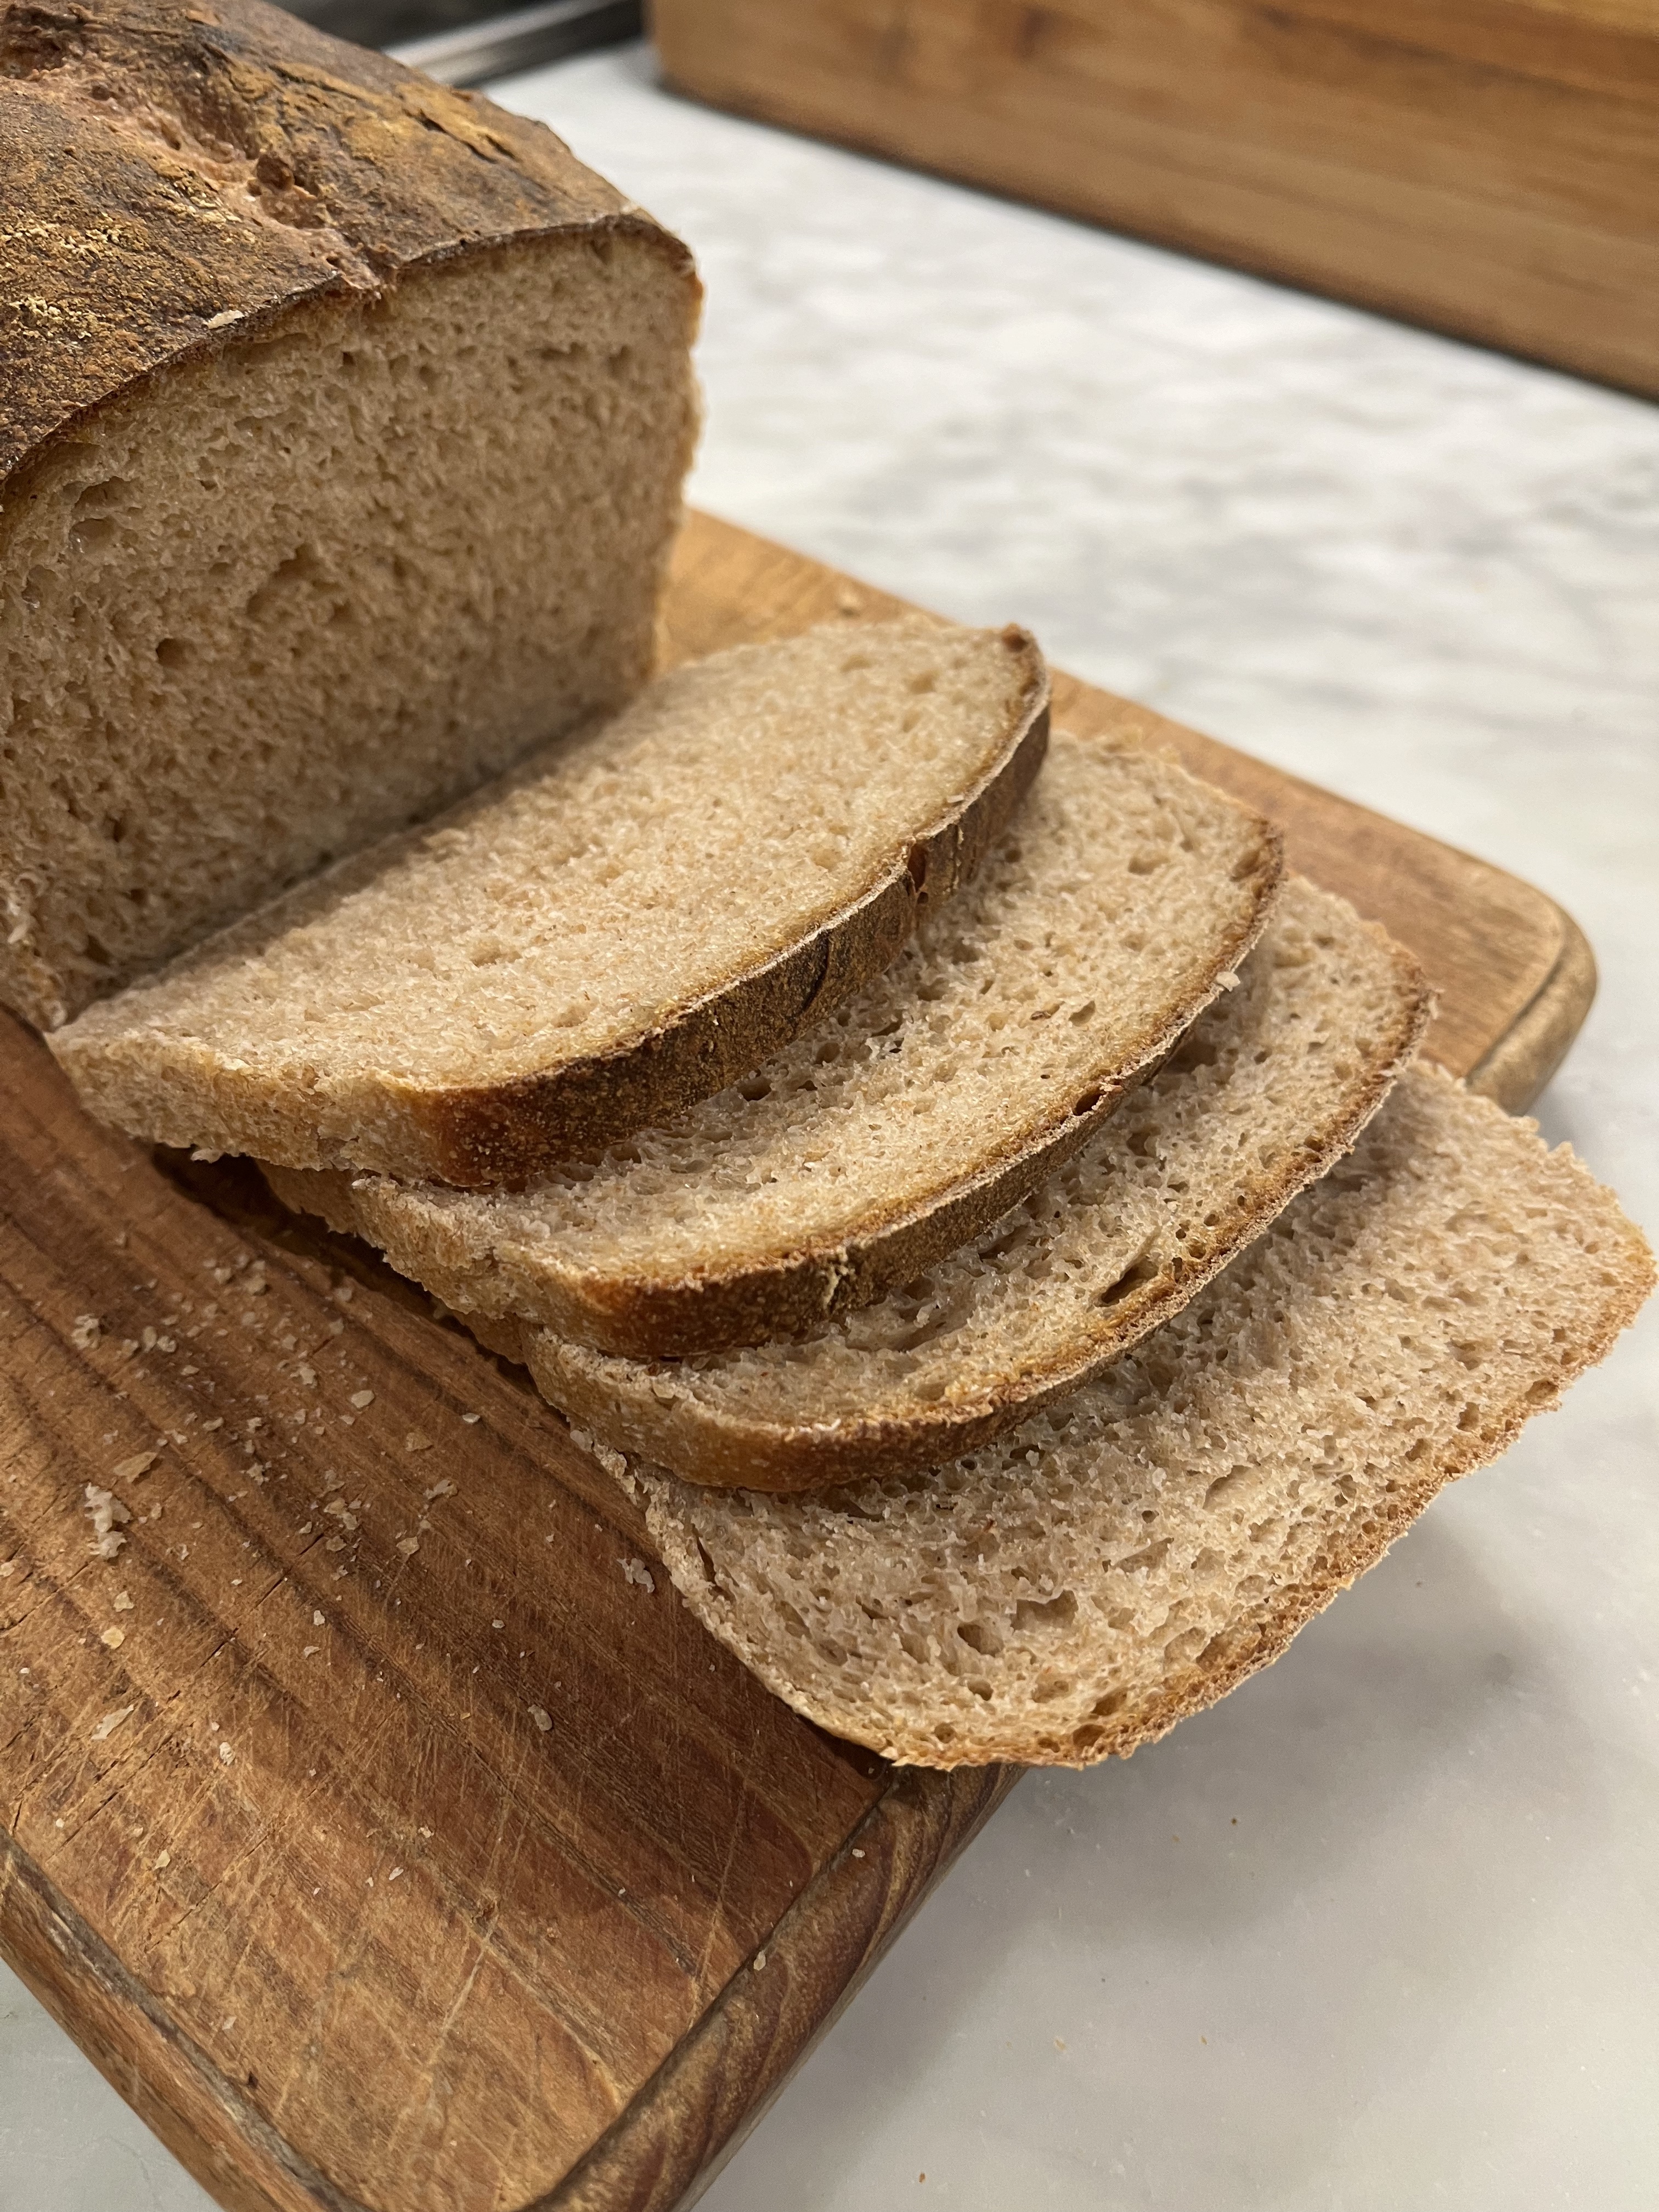
This recipe uses 50% whole wheat flour, which gives it a nutty flavor and some bite, but not too much, and there’s a hint of sourdough tang. All that and the dense crumb makes for great sandwiches. This is our current house bread.
The basis for the recipe is this Hearty Sandwich Bread (the former house bread). Timing has been changed to allow for the longer sourdough fermentation time and the weights have been increased a touch so it fills the pan more.
Recipe
Active time: 10 minutes | Inactive time: 12.5 hours (18.5 – 20.5 hours including starter feeding)
Equipment: Large bowl, 1 pound (8.5″ x 4.5″ x 2.5″) loaf pan, scale, scraper, oven
Ingredients
100g
Active whole wheat starter
230g
Bread flour
180g
Whole wheat flour
7g
Salt
320g
Water (room temperature)
If needed, feed starter. I usually set out the filtered water so it comes to room temperature. Once the starter has at least doubled in size, go to step 2.
In a large bowl, combine all ingredients and mix well until a shaggy dough forms and no dry flour remains.
Cover bowl tightly with plastic wrap and allow dough to ferment for about 10 hours, it should double in size.
Grease the loaf pan with butter.
Turn the dough out onto a floured work surface–it’s going to be very sticky.
Sprinkle a bit more flour on top and with floured hands, pat the dough down to remove any large gas bubble and form a rectangle.
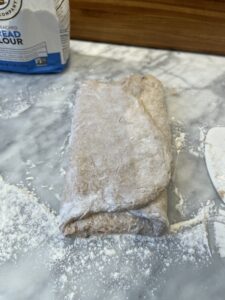
Fold the rectangle over on itself in thirds.
Turn the dough 90º, repeat the patting and folding in thirds process.
Pat and form a rectangle that will fit the loaf pan, lengthwise.
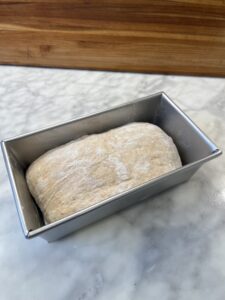
With floured hands, roll the rectangle into a loaf and place in the pan seam side down.
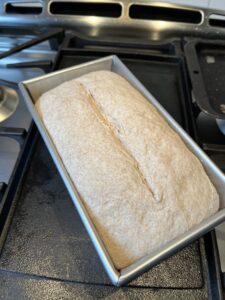
Cover pan with plastic wrap and proof until the dough is rising up to the top edge of the pan, about 2 hours.
About 30 minutes before the loaf is ready to bake, preheat the over to 450º F.
Slash the top of the loaf with a razor or sharp knife, or don’t. It might be difficult to get a clean cut since the dough is quite wet.
Place in oven, bake for 15 minutes. Then, turn oven down to 400º, rotate pan 180º and bake for another 17 minutes.
When done, the top of the loaf should be medium-dark brown with an internal temperature of 190 – 200º
Remove from oven and turn loaf out onto a wire rack to cool completely before slicing.
Bread dough folded in thirds.Bread dough rolled and placed in pan before proofing.Bread dough, proofed and scored.
Notes
After trying metal and glass pans for this recipe, I’ve settled on glass. The crust didn’t brown enough in the metal pan.
My preference for sandwich bread not too brown on the top. Turning the oven down after the first 15 minutes is just right for me. If you prefer yours more bien cuit, leave the oven at 450º and cook for 15 rather than 17 minutes after rotating.